There is great happiness in not wanting, in not being something, in not going somewhere...
Showing posts with label Crafts. Show all posts

Wednesday, 24 September 2014

The Woodman....

Sometimes in life you are totally blown away by your nearest and in this case most definitely dearest! LSO (for those of you who have just started to read my blog - this is my darling and much loved husband - I call him Long Suffering One - LSO, why? because he has to put up with me and all my mad schemes and wild ideas! ) LSO is always trying to get out of DIY things, if I want him to - mmm, lets say drill a hole into a wall - it becomes EPIC! to get this done I get out the drill, plug it in mark the exact place were I want the hole, have the picture ready , then I make him tea and ease him into doing it for me - I did Say EPIC!!  By his own admission he just doesn't like DIY!
 
So imagine my surprise when one afternoon I heard sounds of the sander from our garage! I silently crept down to see what was going on..... It was him engrossed in a piece of wood! I left I needed to sit down! A few hours later he came inside and said that he had made something for me(be still my BEATING heart) He had found a beautiful piece of wood in the fire wood and made a Cheese Board for me, it was absolutely gorgeous!
 
 
Tools of the trade
 
Firewood with Potential


My Cheese Board


Little Madame and Star!
  
The Sandman
Now I am a bit of a strike-while-the-iron-is-hot type of person person!..... I had been thinking a bout a rustic outdoor tray for ages, every time I looked at my pile of left over pallet wood - a tray was what came to mind. I was going to make it myself ....however... I thought I would try my luck!
 
 
And my luck was in! Apparently he felt like doing woodwork, so with me telling LSO exactly what I wanted he put it together for me. He drilled, measured, cut, planed and sanded......Soon I had my tray
 
 
Somehow, and maybe its because he knows me so well, he was able to make exactly what I wanted!  
  
My Tray
Not only did I get my tray but then he then went back into the garage and made himself a beautiful wall hook for his study - the word that comes to mind is GOBSMACKED! I really didn't know he had it in him. To think that I have known him for 16 years and he never told me.... He is really GOOD at wood work! I do however feel a little sorry for him now - can you guess why? Yip! He is NEVER EVER NEVER going to get out of doing DIY for me again - NO excuses and certain No begging and pleading (he translates those two word into nagging) He can and he is  really good at it!  Did I mention how much I love my LSO..... I love him too much..... xxx  
  
Wall Hook


Sunday, 23 March 2014

Mollie Makes...Made!

As you all know, I love, LOVE ( - there that's better -shouty capitals) magazines, in particular, Mollie Makes! I have mentioned before how much I adore these magazines.... so I certainly will not bore you with that all over again, in fact this post is about making all the sweet free gifts that come with the magazine!   
 
 
LSO will tell you that I drive completely mad when we go to the UK, I am into W.H.Smith as soon as my little feet clear customs.... I buy Mollie Makes and Simply Crochet, just so that I can have the free makes that come with these 2 magazines. Next, I check the dates to see whether I will be able to purchase the next issue before I leave - I am like a woman possessed and what's more I am not shy to tell you , I have been known to be grossly over weight and have to take magazines out of my suit case on the return flight home ! As I said I drive LSO completely MAD!!!
 
So here is the problem, I never seem to get round to making up the bits and bobs on the magazine so I end up with a pile of magazines that just don't stack! No matter how I try, I cannot pile them properly! So in keeping with my new years resolution of finishing the projects I start..... YES I am trying and so far so good! I decided to get stuck in and make all my Mollie Makes freebies from 2 years back! 


I got them all out, photocopied all the patterns that were needed for the sewing projects, cut them out, pinned them all, read the instructions and got going..... I tackled my favourite first, CROCHET of course.....  


A very easy bow brooch, it took 20 minutes and Little Madame asked me to put it onto a hair clip for her as soon as she saw the finished item!


A pretty flower brooch came next! Mmmmm I know it doesn't look like the one in the magazine, but it is pretty enough for me! I think I was too busy watching Grey's Anatomy, so too much concentration was on Mac dreamy and not enough was on Mac brooch - priorities Ashley!
 

A pretty coaster for my cappuccino's worked out beautifully!

Then came some embroidery!   Now me and embroidery are not so good together, but I had to try....


The little buttons are very sweet, and I tried I really did, I really ReAlLy, REALLY wanted to get this right, I was envisioning a pretty little blouse for Little Madame with sweet little home made buttons...
 

But as you can see, it was not to be my tiny embroidery was big and didn't fit onto the tiny little button  and I hate to admit it but I gave up after the second button....
 

The sewing project were all very easy, and quick and I managed to plough through them in an afternoon! The some of the kits are supposed to be hand sewn but I have this KILLER new machine.... so decided to machine sew everything.... some worked really well, other could have been neater....


The Mollie Makes sausage dog is my favourite thing, she is so sweet, and looks perfect on my bookshelf... 
 
 
A luggage tag, a  coin purse, a cell cover, fish handbag charm, a travel card wallet and a blue bird charm, which was immediately put onto my handbag! 
  
 
 Sweet and easy sleeping fox brooches to add to my collection..... And I was done!
  

I was feeling quiet chuffed with myself..... all done in three days and I had really enjoyed a few quick small projects. The next day I was in out local newsagent, what did I see on the shelf - that's right you guessed a new Mollie Makes and then LSO arrived home from a trip to Scotland, and proudly produced 2 BRAND SPANKING new Mollie Makes from his suitcase( the DARLING man) I was back to square one....  a lovely pile of Mollie Makes and 3 gorgeous new mini project to complete.... Today, I think not! Maybe I will just wait till I have a whole pile again ......xxx 


Tuesday, 24 December 2013

All I want for Christmas.....


All I want for Christmas is one last ingredient.... What??? I hear you all ask? Well let me explain, in our family we have a tradition, we bake a certain cookie every year, as a matter of a fact Christmas cannot go by with out these particular cookies.... I think there would be riots and strikes in our family were the cookie jars not filled with them on the 16th of December each year..... My grandmother Nanny, baked them , my mother and Aunt baked them, alas my Aunt has gone off to her family in another part of the country( how rude).... And as you all know my mother(insert sad face here) passed away this year  and so it has fallen on my shoulder to make them.....
 
They are called Soetcookies, no one quiet knows how come these yummy spicy little cookies are our particular choice of Christmas cookie but they just are...... We all love them! A lot!
  
   
Soetcookies
  
So promptly and dutifully on the 16th of December, I got out the recipe book and got started, I did everything by the book exactly as my mother had written it down, they smelt great and looked good......  
 
But Houston, I had a problem...
 
At round about the same time my brother called me, he had decided to make the Soetcookies too but had also hit a problem, the exact same problem.... the dough was crumbly, and you could not roll it out, at all......
 
Crumbly....
 
My sister and I pondered this dilemma over a cup of coffee and decided that we would add milk bit by bit until the consistency was good to roll..... it worked.... Thankfully as riots and strikes over Christmas would just not do!
 
That's Better....
  
So I am sure that by now  you want the recipe....
 
 Our Family's Soetcookies
 
4 pounds Flour
2 pounds Brown Sugar
1 pound Butter
3 Eggs
2 tsp of Bicarb in Milk
1/2 Cup of Brandy
2tsp Cinnamon
2tsp Mixed Spice
1 tsp Cloves
2 tsp Ginger
salt to taste
 
Cream the Butter and sugar
Add the rest of the ingredients
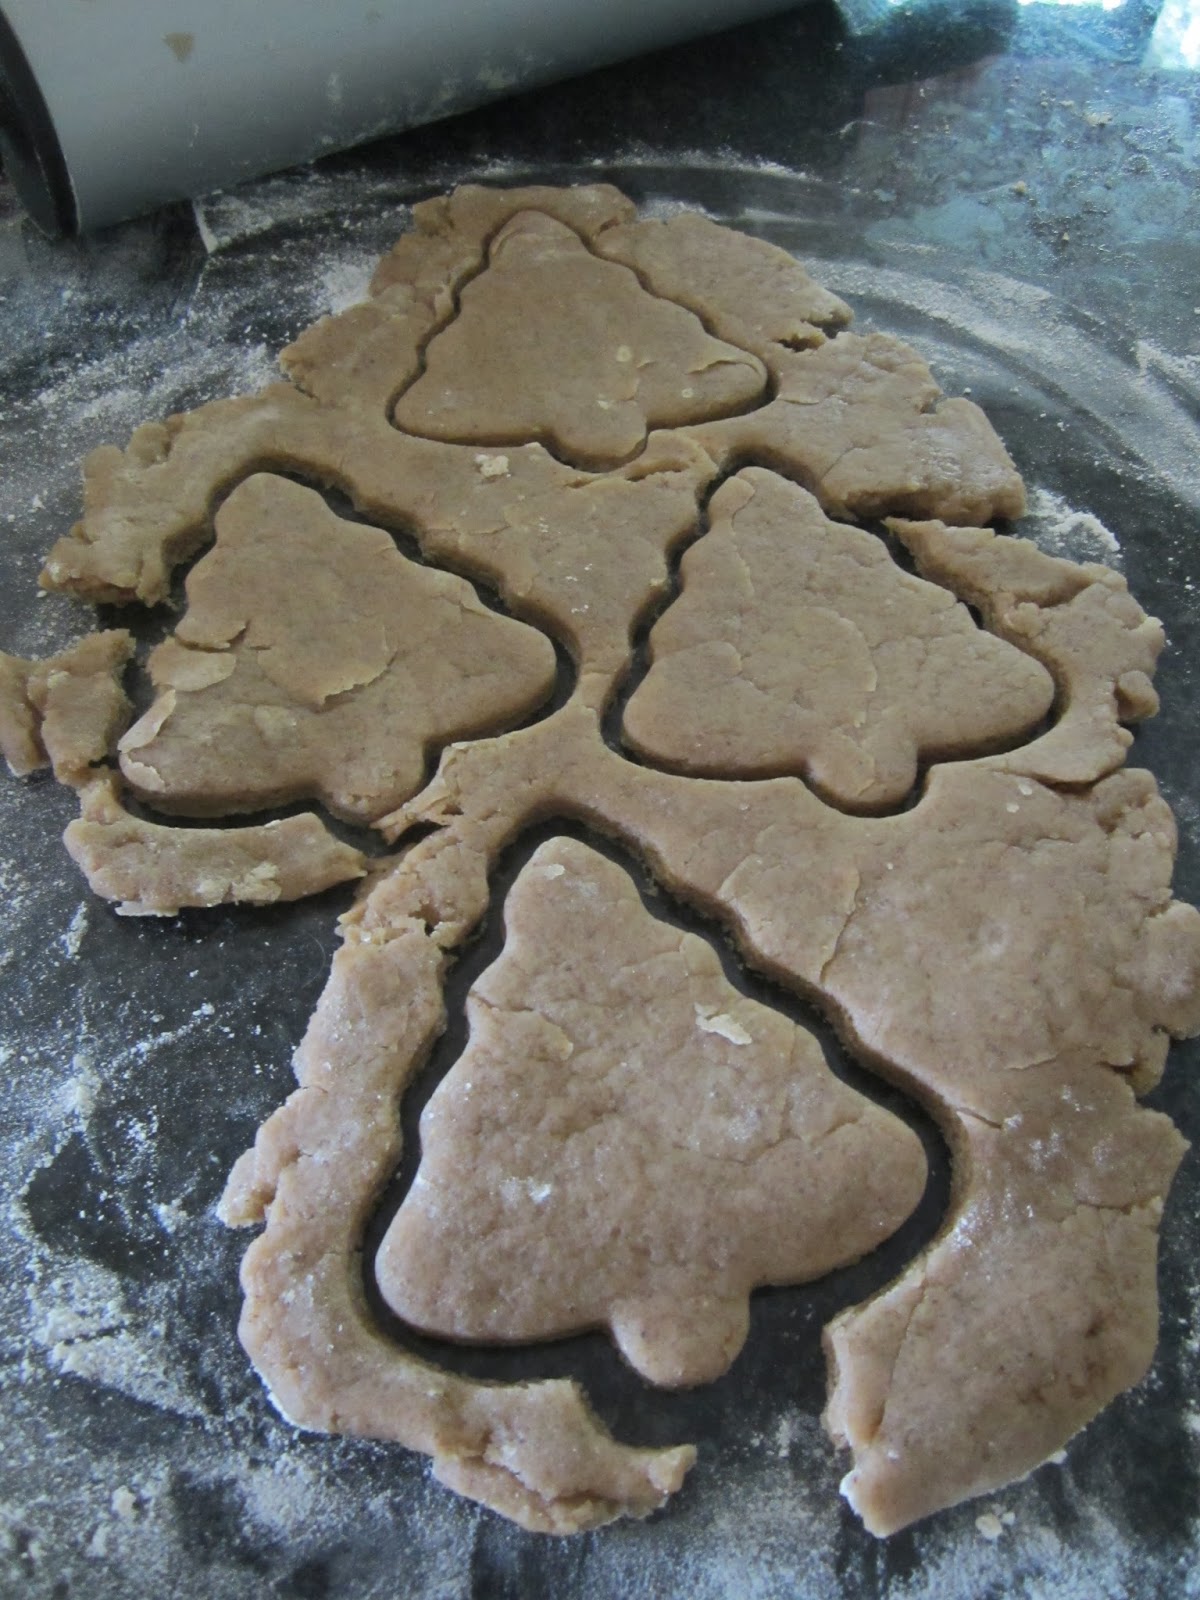
Roll out and cut out Christmas shapes
Decorate with nuts and cherries(the traditional thing, I decided on Christmassy M&M's)
Bake for 10 to 15 min at 170 degrees Celsius
 
And as always..... Apply to mouth.....
 
M & M's

Baked
 
They WORKED thank Heavens.... And are SUPER  YUMMY! Cindy and I  have had more long conversations about the recipe, and have decided that we need to use a half a cup of milk to dissolve the Bicarb and we also doubled up on the spices.... to make them more spicy of course....
   
A Heap of Yumminess
 
And so Mommy, if there is anyway for you to let me know..... All I want for Christmas is that missing ingredient..... Please ... If you could......Oh and STOP laughing at us! xxx
   
A Beautiful Rose
PS : 1 pound is equal to 500g according to one of  my recipe book


Tuesday, 10 September 2013

mosaic magic

 
At one time or another I have tried almost all types of crafting, I enjoy it, I like doing new things, I really enjoy creating things for my home! Beautiful things that I can look at and know that I enjoyed doing and spent hours making! Some I have continued to do and other have really just been too much  effort and some have just not endeared themselves to me so I have never done them again.
 
I have never tried to mosaic - I remember buying some bits and bobs to try many years ago but I never got round to making whatever it was I was going to make..... (you know me - I was probably onto the next thing I had seen...) It just never seemed to appeal to me, I have friends who love it and are mosaic mad but as I said - me not so much!
 
Yes , I am getting there.....
 
A few weeks ago I decided that I need a quiet spot in my garden to sit and well.... be quiet! so I got LSO to level out some ground under a tree for me! It was PERFECT! I added some pavers(well LSO did - the darling man!!) and then moved a very old Mexican fire pot to the spot and went out and bought some beautiful BeAuTiFuL bright blue pots, they matched the blue rim at the top of the Mexican fire pot! I then moved an old table an chairs onto it , but ALAS..... the wood on the table was rotten, it had been eaten by "turnbites" as Little Madame so eloquently put it! As I did REALLY, REALLY not want to spend a fortune on this small garden project I was very unhappy!! 

My Quiet Place

Over the next few day I had a look around at various shops and garden centres, but all the tables were very dear. In one garden centre I spotted a mosaic table and BAM!! Yes, you guessed it I thought why not mosaic the top of the old one!

We had some old wood  boarding lying around so I got our handy man Stephen to cut a circle out for me. I varnished it to protect it from the weather. Then the search was on for beautiful blue tiles, the amount of gorgeous tile you can find is astounding..... I was at a loss and as I didn't have a clue what pattern I was going to follow I just bought a whole pile of random tiles and a tile cutter.  I also had the idea of a willow type pattern and got Little Madame to break two old plates for me...... with much gusto she smashed them onto the slate next to our pool - I think she thought I had gone mad.....Asking "are you sure mama?"
 
A Box Of Beautiful Blue Tiles

Joy!

So one beautiful sunny morning I sat down with Little Madame and got started, I didn't want to follow any pattern I just want to be creative and see were it went, a BEAUTIFUL blue and white ceramic rose was glued into the centre and off we went!  I was pleasantly surprised because doing mosaic was really very quick and relatively easy! I drew a circle in the middle of the table and filled it in with the broken willow pattern plates, it looked good, Little Madame then circled around that with mirror tiles   and tiny squares came next! The outer edge of the table was next, I placed a greeny/bluey butterfly every 20 or so tiles...... it looked lovely! 
  
Willow Pattern Circle


See What I Mean

I really must say that I think what  really helped the creative juices to flow was the fact that we were working outside on our veranda. So much of our life is spent on our back veranda, we lounge there under blankets in the winter with piping hot coffee's and in the summer months we  love lying in the cool breeze after long swims in our pool. We eat outside often, watch the sun come peeking up over the trees in the morning and now it has become our make shift craft room!  And after a chilly winter, finally it looks like spring is on the way and working with all the beautiful aqua blue colours in the warm  sun  was food for the soul! (ohhhh I am waxing again - but I do so LOVE our home!)


Now the middle of the table proved to be a bit of a challenge for us....... Nothing looked quiet right. Maybe working with a pattern would have been better for novice 'mosaicers'(is that even a word?) We changed it a few times before we were totally happy with it! And then it really was a case of filling in the rest of the table!


I ran out of tiles at this stage, and went into a bit of a PANIC, but luckily found the exact tiles again! WHEW!!


And so, the top of the table was finally finished, and I was as pleased as punch!(I wonder where that saying comes from? - Anyone  know?)


The rim was tricky and I had to balance it every which way to get the tiles to stick and eventually tied them on with a piece of string, to be honest I just did not have the patience to wait for some to dry then turn it and wait again.... I wanted it to be done! The next day I made the grout and slopped it all onto the top of the table and got stuck in, it was messy but  such  fun! I also need to say that my hands got a bit cut, not badly but a few of those tiny little irritating cuts that are just achy - So what I am trying to you  here is make sure that your tiles are the same width, so that they don't poke up and  cut your little hands! I could tell you exactly how to mosaic but really it is simple cut tiles, glue them on and grout!

 
And so here it is my BIG FAT MOSAIC.... TA DAH!!!!!! And as you will see the Ta Dah is in shouty capitals so I think it is safe to say that I am very H-A-P-P-Y with it!


It looks like a different spot now! I also added some more pots and a few pretty little tea light lanterns (which look so gorgeous at night, butI couldn't get a good picture - Sorry!) I am thinking of painting a few old pallets blue and fixing them to the fence behind the tree, which would add some privacy. I also think some to fairy lights for the tree would add to the loveliness.  I think that my magical mosaic reading/relaxing/contemplating life spot is nearly complete. All that I need now is a warm fire in the Mexican fire pot,a good book and a really good cup of coffee and I will be all set(Oh and maybe a babysitter) - Anyone care to join me?......... xxx   


Thursday, 5 September 2013

Holiday Home

  
 Little Madame has everything that opens and shuts..... at last count she had 42 Barbie dolls, excessive I know, but for every new Barbie movie there is a new doll - and she just HAS-TO-HAVE -IT or she would apparently die - and we cant have that now can we...... She has a LaLaLoopsy House, a Barbie house and the latest fad was a Sylvanian Families House, so all in all you can see that I spoil her ROTTEN - Yes I do I am not ashamed to admit it,  I will step up to the plate...... I spoil her.
 
Now the funny thing about children is that no matter how many of the latest toys they have, the simplest thing keep them the happiest - Isn't that the truth! Think of your child's first Christmas, toys galore and what did they end up playing with? The BOXES and WRAPPING PAPER...... Well my Little Madame certainly did!
 
Where am I going with all this rambling .... Here it is.... During the recent school holidays, Little Madame brought me a book that we had bought a while back on a sale called The Rainy Day Book. with all sorts of crafts to do on rainy days of course, she want to make the little dolls house..... You have four dolls houses go play with those.... But I L-O-V-E this one Mama -  See what I mean!! 


It was actually a really ingenious idea, using any old box, and house hold bits and bobs, small boxes, match boxes, pipe cleaners, lids from various thing and some scrapbook paper. As a matter of fact we did not need to go out and buy anything at all.
 

So with everything we needed, assembled we set to work - I used an old storage box, but a shoe box would be perfect too. We cut and gloopy glued, scrap book paper to the walls and floors. Match boxes were emptied and made in to chest of drawers and a little arm chair, and Little Madame produced  the cutest little lamp, made from a cupcake liner, pipe cleaner and a cotton reel, it really is very sweet. Now the one thing that little peeps don't have is patience.... not even a little, so I had to distract her with other tasks while we waited for gloopy glue to dry. I got her making Perla bead flowers for the flower pot, which was a toothpaste top! (the beads did not work and in the end we used a little lace flower)
 
 
I used anything I could find, a tiny Estee Lauder sample box became a cupboard, the carpet is a knitted square and the table is a tablet lid glued onto a glue stick top. And the best thing about it all was that is was not fiddly work, little fingers could do it all(with the tiniest amount of supervision)!  


Now the book says to paint all the furniture but as attention spans are not so very long at this age, I cut out strips of scrapbook paper and helped her cover  all the furniture, a glue stick worked really well here as it glues instantly and there is less mess! The Chair was four match boxes stacked , and the chest of drawers was three match boxes stacked on top of one another(the drawers even open and close), so simple but so sweet!
 

We glued a tiny peg onto the wall for picture hanging and Little Madame made a window, to which she glued some lace as a curtain. A pompom served as a cushion and VOILA......


The house was ready for a sweet little Sylvanian bear to move in..... This little bear had apparently been tossed out of the Sylvanian house as she was "bery bery naughty!'


Now after watching Little Madame spend hours playing with this cute little box house, I got to thinking, what about stacking and glueing a few boxes on top of one another, you could make a big house with a few rooms.... A mansion in fact, and it would cost next to nothing, You could let your little ones design their very own homes..... Which also lead me to thinking about all the gorgeous toys that I always tell LSO she really, really wants.... Are the toys for Little Madame OR for me?...... Mmmm I wonder?....  And what ever you do, don't tell LSO xxx